
This post documents the process of integrating FreeRADIUS with Google G Suite (now Workspace) using Secure LDAP. FreeRADIUS will be used to authenticate Ubiquiti Unifi WPA2 Enterprise WiFi users. The configurations presented here are taken from this wonderful repository. While the repo uses Docker, we will be implementing these settings in FreeRADIUS directly. These settings were tested on Debian 10.
First, follow steps 1-3 given in Google’s support article and also generate access credentials. At the end of these steps, you’ll have a certificate and key along with your access credentials.
Then, install FreeRADIUS and its required packages:
apt update && apt upgrade
apt -y install freeradius freeradius-ldap freeradius-utils
Upload the certificate and key files downloaded from Google G-Suite Admin account into the following directory:
/etc/freeradius/3.0/certs/Rename those files to:
ldap-client.crt
ldap-client.key
Next, use a text editor like nano to edit /etc/freeradius/3.0/clients.conf:
nano /etc/freeradius/3.0/clients.confAdd the following lines at the end (replace 192.168.1.0/24 with your LAN subnet and testing123 with a more secure secret):
client unifi {
       ipaddr          = 192.168.1.0/24
       secret          = testing123
}
Use Ctrl + X to save and exit.
Edit the default virtual server:
nano /etc/freeradius/3.0/sites-enabled/defaultIn authorize section after pap add this:
        if (User-Password) {
            update control {
                   Auth-Type := ldap
            }
        }
In authenticate section:
authenticate {
        Auth-Type PAP {
                ldap
        }
Uncomment ldap:
#       Auth-Type LDAP {
                ldap
#       }
Save and exit.
The same changes need to be done in /etc/freeradius/3.0/sites-enabled/inner-tunnel to edit the inner-tunnel virtual server.
After that execute the following commands as root to enable ldap module:
cd /etc/freeradius/3.0/mods-enabled
ln -s ../mods-available/ldap ldap
Now, edit the ldap module:
nano /etc/freeradius/3.0/mods-enabled/ldap

server = 'ldaps://ldap.google.com'
port = 636
Enter your access credentials here:
identity = 'foo'
password = bar
Enter your domain here:
base_dn = 'dc=example,dc=com'
In tls section:
start_tls = no

certificate_file = /etc/freeradius/3.0/certs/ldap-client.crt
private_key_file = /etc/freeradius/3.0/certs/ldap-client.key

require_cert    = 'allow'
Save and exit.
Next, set up the eap module:
nano /etc/freeradius/3.0/mods-enabled/eapIn eap section:
default_eap_type = ttlsIn ttls section:
default_eap_type = gtcSave and exit. Finally, set the proxy settings:
nano /etc/freeradius/3.0/proxy.confEnter your domain at the end of the file:
realm example.com {

}
Save and exit.
Use the following command to restart FreeRADIUS service for new settings to take effect:
systemctl restart freeradius.serviceFreeRADIUS settings are now complete. On the Unifi Controller, go to Settings -> Wireless Networks and either create a new wireless network or edit an existing network. In Security select WPA Enterprise:

It will require a RADIUS Profile to be specified. Click on “Create new RADIUS profile”. Enter a name for the profile and specify the IP address of your RADIUS server and its shared secret (created earlier).
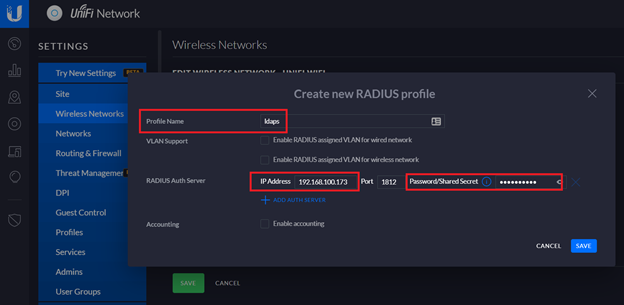
Save the changes made to RADIUS profile and Wireless network.
To setup a mobile client to connect to this network enter your G-Suite Username and password like this:
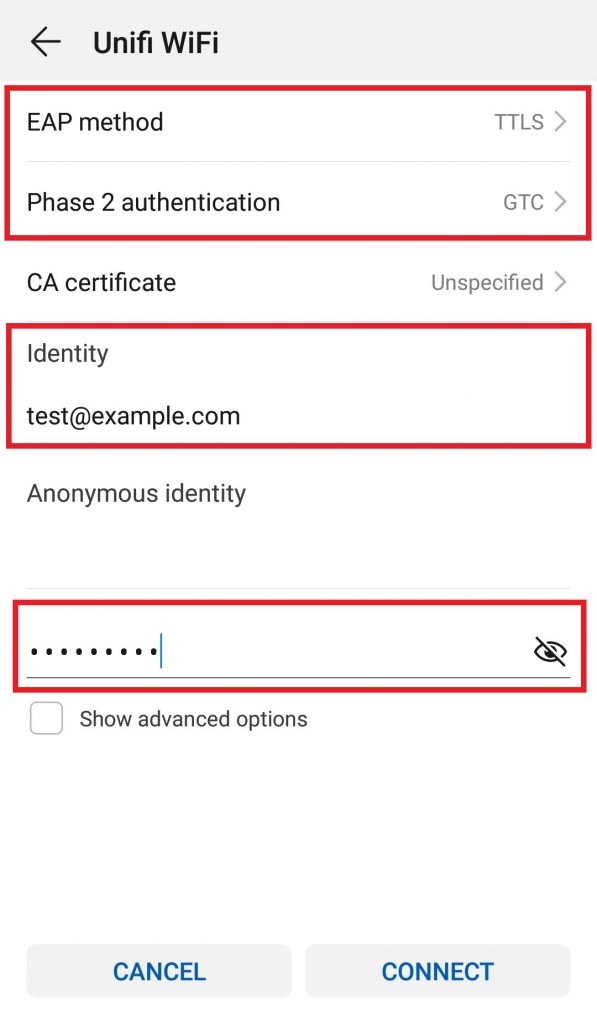
Note: Users are free to enter only their User ID or complete email address in <UserID>@example.com format. It should work either way.
In case of an error, make sure the EAP method is TTLS. For Phase 2 or inner tunnel use either GTC or None. Some devices will auto-detect these settings but on some devices you might need to select them manually.
Generating Certificates for Windows Clients
For authenticating Windows clients we need to generate CA and server certificates on FreeRADIUS and install them on client machines. FreeRADIUS provides helpful scripts for generating certificates.
To generate a self-signed CA certificate (which is what is recommended for RADIUS deployments), open the CA configuration file:
nano /etc/freeradius/3.0/certs/ca.cnfIn CA_default section increase the number of days so that the certificate will be valid for a long time (10 years in this case):
default_days = 3650In req section change the input_password and output_password from their default values:
input_password          = tj367tHXVK
output_password         = tj367tHXVK
In certificate_authority section enter your organization’s information:
countryName             = US
stateOrProvinceName     = FL
localityName            = Miami
organizationName        = NPO Systems
emailAddress            = admin@nposystems.com
commonName              = "NPO Certificate Authority"
Save and exit.
Run the following commands to generate CA certificates:
make ca.pem
make ca.der
Next generate server certificate by following the same procedure:
nano /etc/freeradius/3.0/certs/server.cnfChange default_days to a large value, input_password and output_password from their default values and enter your organization’s information in server section. Make sure the commonName entered here is different from the one entered in ca.cnf:
default_days            = 3650

input_password          = tj367tHXVK
output_password         = tj367tHXVK

[server]
countryName             = US
stateOrProvinceName     = FL
localityName            = Miami
organizationName        = NPO Systems
emailAddress            = admin@nposystems.com
commonName              = "NPO Systems Server Certificate"
Save and exit.
Generate server certificate by running this command:
make server.pemEnsure generated files have the right ownership:
chown freerad:freerad /etc/freeradius/3.0/certs/*Add the paths of newly generated certificates in eap configuration file:
nano /etc/freeradius/3.0/mods-enabled/eapIn tls-config tls-common section add the following values:
private_key_password = tj367tHXVK
private_key_file = /etc/freeradius/3.0/certs/server.pem
certificate_file = /etc/freeradius/3.0/certs/server.pem
ca_file = /etc/freeradius/3.0/certs/ca.pem
Save and exit.
Restart FreeRADIUS service:
systemctl restart freeradiusInstalling Certificates on Client Machines
Windows
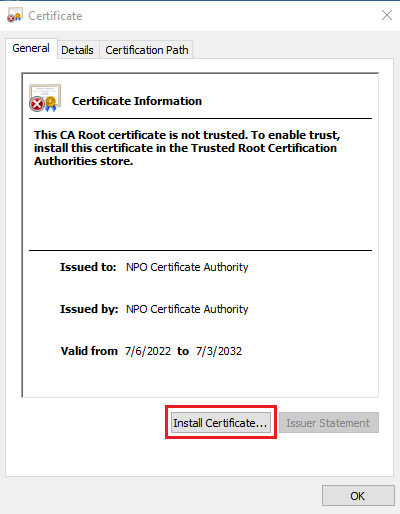
Download ca.pem and ca.der certificates from /etc/freeradius/3.0/certs/ and distribute to your clients. On a Windows client, ca.der certificate can be installed by double-clicking on it and following the installation wizard:
Place the certificate in Trusted Root Certification Authorities store:
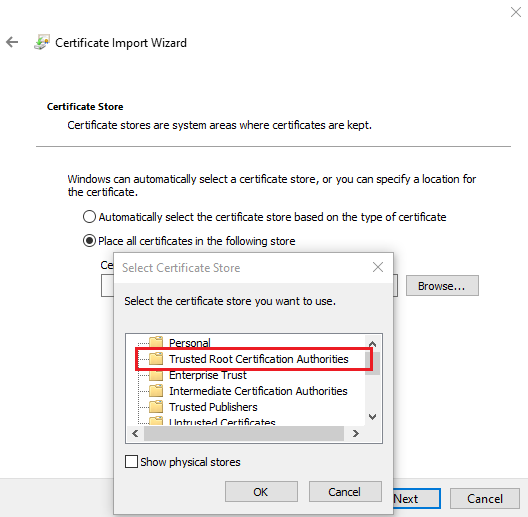
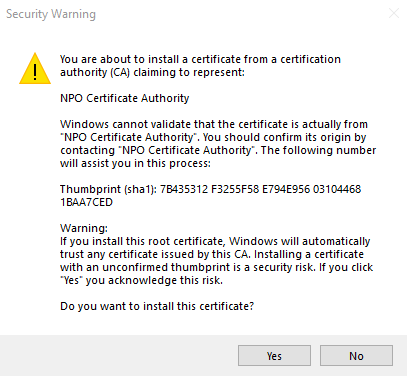
After completing the wizard, accept the security warning:
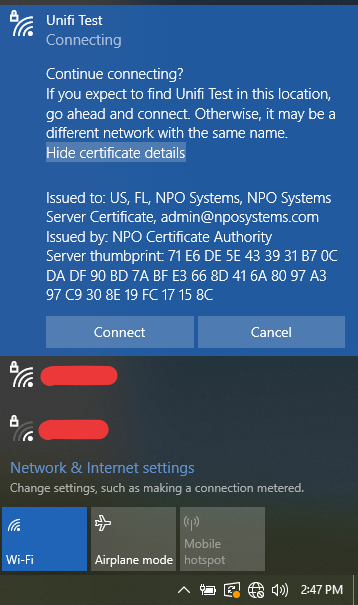
Connect to the WiFi by entering your username and password. If it shows you the certificate information click on Connect to continue:
Ubuntu
The CA certificate in pem format needs to be converted to crt format. It can be done by executing this command:
openssl x509 -outform der -in ca.pem -out ca.crtDownload ca.crt file and put it in /usr/local/share/ca-certificates/ directory on the client machine. Then, install the certificate:
sudo update-ca-certificatesConnect to WiFi by selecting Authentication Tunneled TLS, Inner authentication GTC and entering your username and password:

Troubleshooting
In case of any issues troubleshoot FreeRADIUS by first stopping its service:
systemctl stop freeradius.serviceAfter that start it in debug mode:
freeradius -XFollow the debug output to troubleshoot further.
Leave a Reply